I love it when a project is 'multi-functional'. A little bit more than meets the eye.
I also love it when my club ladies 'ooh and ahh' and get that wicked gleam in their eye...they just KNOW they are going to home and make a mini-herd of the project before them.
A couple months ago I saw an idea by a fellow stamper for bookmark cards. It was just brilliant, and while I'd love to take the credit, I can't. I'd also love to GIVE credit, but if you've seen the state of my craft room...you know I've put the sheet of paper with the deets in a safe place.
If I ever find that safe place I put things there are keys, unread books, probably my missing socks, important slips of paper, and I'm convinced...several hundreds of dollars. Good thing my cat was self-sufficient, and my children are loud...
If I find you, oh creator of this pattern I will surely edit this post...and if you are the creator of this pattern, puh-leez leave me a comment and a blog address so that I can commend you!
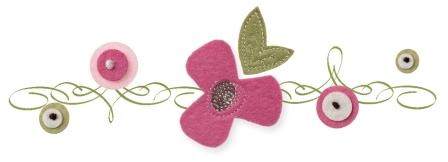
On to the good and pretty!
Cute huh? The card is a 6x6" square of paper folded in half for the base. (You can get four of these bad boys from one sheet of 12x12..I LOVE THAT).
All of the products are Stampin' Up!,
Rich Razzleberrycardstock (base)
Melon Mambo cardstock (mat)
Razzleberry Lemonade Designer paper
Whisper White cardstock (ultra silky smooth)
Large Silver Grommet
Razzleberry Polka Dot Grosgrain Ribbon (I can't tell you how amazing this ribbon is!!)
Melon Mambo Classic Ink
Rich Razzleberry Classic Ink (butterfly) ..ooh matchymatchy me
Basic Black classic ink
Silver brads
StampinDimensionals (pop up the butterfly and act as a stopper against acetate)
a strip of acetate (used to make see through band to hold bookmark on card)
Additional Stampin' Up! items used but not pictured:
a hole piercing tool (for the brads)
Tombow "snail" tape runner adhesive
1" circle punch to make the hole for the grommet
Here's a shot of the card with the bookmark pulled out from behind the acetate band....see? Isn't this cutie patootie? You could stamp a message that shows through behind the acetate, like an additional sentiment.
Speaking of the stamp set used, it's a great little number called GREAT FRIEND, from Stampin' Up!
It's a rubber on wood mount stamp set, with 5 pieces in the set. It's gorgeous. It's only $23.95, and yes, it's available through me, as well as any of the products named above! You can place orders online or by contacting me (Canadians only).
Extra bonus this month!!! When you place any order of $50.00 with me by email or via my website I will send you a FREE step-by-step tutorial, with pictures, on how to create your own bookmark cards! Additional shots of inside and back of card will be included, as well as pictures of 2 alternative bookmark card ideas.
I'm not sure how this started, but we have another blog hop that has been born of the ladies on Twitter. Join us, read on, follow along each stop on the Blog Hop (links will be provided within each stop) and you'll unravel the story of "Get Ill Soon" and you'll also be treating your eyeballs and funnybones to some really awesome creations of paper artistry.
If you've arrived from the previous blog stop, Lisa's blog, www.papergrace.blogspot.com a big welcome to you. If you've started here, then please do read on and the next stop is provided to you at the bottom of the posting. We'll take care of you...now on to the goods.
So, my friends, dont'cha sometimes wish that you had a magic prescription pad where you could prescribe that wonderful co-worker an extended sick leave, your ex-cheating boyfriend a little (erm...) well I'll leave that one alone...you get my point.
Well I have it. The magical GET ILL SOON prescription pad, for writing your own 'sick' prescriptions to those that are ticking you off.
A closeup of the focal point. NO SOUP FOR YOU...haahh, i've been dying to say that. All puns intended. See how all the feel goody-ness is crossed out? I can be bad like that. I had to add a little vellum and polkadot designer paper, to soften the blow...
Loads of funkeh grosgrain ribbons...in saffron, real red and basic black compliment the colour scheme....
Open up your 'sick' little prescription pad and give someone a piece of your mind...
"Dear Susy Snarky, please get ill soon. Take this prescription for 3 days sick leave , so that I can get my job done. " Sincerely, YOU KNOW WHO.
Now for your next spot on the Blog Hop please visit Ms. Understand Blue herself, Lydia Fiedler...where I'm sure she will shock, awe and amaze you with her mad skillz.
If you would like to win your own sick little prescription pad please leave me a comment, a way to contact you, and tell me why you need the power of the 'Get Ill Soon'. I will do a draw next weekend!
So this is what's been keeping me busy for the last couple of weeks. Babies....
Babies, we knew they were hard work, but I'm here to tell you 75 babies keep you very, very busy indeed. Aren't they just the most adorable bundles of joy? I love them. I've been making these babies for a 25 member punched art swap meet at our team convention on Saturday. I hope the ladies love them as much as I do.
Each baby is constructed from a variety of shapes of punched card stock, in this case a wide oval punch, circle and flower are used. See end of post for a more detailed list.
If you haven't tried punched art or you haven't been bold enough to do it alone, please come to class or email me! My contact is on my website here. The possibilities are endless with punched art.
Last week I used the scallop circle punch pictured here to make the background sky for the baby bundle cards. If you follow my blog you'll remember this...
The sky backgrounds, got trimmed and mounted onto a layer of Bermuda Bay cardstock, and stamped in Basic Black Classic Ink with the "Rock-a-Bye-Baby" sentiment from the stamp set Nursery Necessities. Nursery Necessities is a gem of a baby set for cards as well as scrapbooking. Details on the stamp set are at the end of the blog post.
Baby Faces up close! I have a few tips to share with you. When doing punched art there are a few things you can do to make your creating go smoother, faster and easy to store...
Can you see the little 'dotted' bits behind the faces, on the paper? That's a temporary adhesive that Stampin' Up! sells called Dotto.
Dotto is a sanity saver.
Really it is. Read on...
Let me tell you more about Dotto. Dotto is helpful when you are creating detailed work, or when you are fiddling with a scrap page layout.
Here I've run strips of Dotto across a piece of printer paper, and stuck down ROWS of baby faces... They are all ready for me to sponge and ink and add detail.
NOT ONLY THAT, but when it was time for supper, I just picked up the page and put it in a protective craft keeper envelope. It stays stuck and waiting for me to pull it out next time! MY FRIENDS...how easy is that?
Think of all the times you've been interrupted by say the phone, come back and the kiddies have picked up your scrapbook page and your layout went everywhere?! No more! Dotto! See the end of the post for product info.
See, here I'm putting down some Dotto and adhering my baby bundles and shapes so that I can do my inking and shading with my sponge daubers. Handy!
Here's a shot of the assembled baby bundles. These were so simple to make.
Close up time! Little rosy cheeks, and white gel pen dimples, awww. Note: the faces are popped up on a foam dimensional before they are stuck down to the bundles.
The sentiment from Nursery Necessities, gel pen highlights, pretty punched border (say ooh...say ahh). LOL!
Again, the finished baby bundles! Thanks toSophia Landryfor her inspiration on baby bundle punchies. I really enjoyed making these little guys.
All supplies used are Stampin' Up! and can be purchased from my store.
**The Almighty DOTTO temporary adhesive** (insert sound of trumpets and fanfare)
Dotto: 103305 $17.95 (Dotto is refillable, don't throw away your cartridge!)
Punches:
Wide Oval Punch 112082 $22.95
3/4" circle punch 107217 $15.95
5-Petal Flower 109041 $22.95
Border Punch: Eyelet Border 113692 $22.95
Cardstock:
whisper white (40 sheets) 100730 $9.95
Bermuda Bay (24 sheets) 115317 $7.25
Kraft (40 sheets) 102125 $9.95
Soft Subtles Assorted Pkg (pink/yellow/apricot/green) 36 sheets (3ea. of 12 colours) 105568 $10.50 *each colour is also available in single packs of 24 sheets for $7.25
I'm still working away on my swaps for our team convention in a couple of weeks. The swap is all about punched art and there are 25 punch lovers participating. I can't wait to see all of the designs!
Here's a gem that I did for a punched art class as well as for my downline. A punchy peacock! Isn't he adorable? Truly a labour of love. (sorry for the thumb print on my camera lens!)
Punches used are :
scallop oval - body and wings #114889
boho blossoms - feet and 'crown' #110711
small star - beak #109045
word window - feathers, neck, head #105090
Additional:
mini glue dots #103683
tombow mono multi liquid glue (ESSENTIAL FOR PUNCH ART!) #110755
Fine Cosmo #108796
Sentiment on the inside: You did such a great job and I'm 'Proud as a Peacock'!
Of course, all supplies are available in my online store, HERE.
Stay tuned in October when My Digital Studio digi-scrapping becomes available!
Well you might say I have my head in the clouds! FAUX CLOUDS, that is!
I'm prepping swaps for our annual local group's stamping convention. I can't show you the whole project yet as it is being prepped in stages (it's so cute!) What I CAN show you are my Faux Clouds (gosh I love all of the FAUX techniques out there!)
You can see my faux wood projects if you go HERE and HERE).
Aren't they pretty? Here's a close-up....
Can't you see this technique used for a summer time scrapbook page border with title, or even a complete background paper?
Supplies Needed:
a scallop circle punch (item #109043 $22.95)
a sponge, come in packs of 3 and I cut them up (item #101610 $4.95)
Hot Tip: The sponges come as a package of 3 large ROUNDS, see how I've cut mine into a wedge? They last FOREVER! Very good deal, and I really like how they apply and DON'T absorb the ink.
Technique: You might be able to see from the picture, that I lay down the scallop punched shape and drag/pounce ink over the template, onto the whisper white cardstock. Then move the punched scalloped circle template around, sponge/ink, move, sponge/ink, move...until the whole piece is covered. Leave some white space and then you can always go back and apply more ink.
Stay tuned, I'll show you the finished deal just as soon as I'm done!
Monday was a special day for a special lady. Lydia's great day started off with a big birthday bang! We secretly planned and schemed behind her back...she taught us all the previous week how to do a 'blog hop' and we used her own super powers against her. BWAHAHAHAHA. (evil laughter).
You all may know Lydia from http://www.understandblue.blogspot.com/ and I have had the good fortune to meet with her on Twitter as a person with an amazing sense of humour, a big, kind and generous heart, a lover and guardian angel of furry pets and animals, a fellow stamper....and well darn it, she's just AS SWEET AS PIE. (and she loves bacon)
So if you don't know her, you will soon because even though I'm late and I couldn't participate in the blog hop formal, I'm going to link you up with the first stop on the Understand BLUE Birthday Blog Hop, right after this tribute to Lydia.
So, last week I made playdough with my small girl. From scratch. Am I a good mommy or what?
It was a cinch, and I become Mommy/Hero to a four year old. Good times.
She of course wanted BLUE (who wouldn't, we understand blue, blue is good, Lydia has shown us the way!)
So we made a variety of things....oh wait what's THIS:
A BLUE ACORN....ODD, how did that get here? We shouldn't just have these things hanging around, because if you have acorns you'll attract...
Squirrels....whoa....see how fast that happened? Well hello little blue guy.
I see you like this little blue acorn. Would you like to have it ? (what am I going to do with this squirrel? I've got to play playdough with my small girl and then get a birthday wish out to Lydia???)
No. NO....c'mere little dude, come here...no no...don't go there, that's not for YOU.
OH NO. He's spied the Chocolate Espresso Bacon Cupcakes from the First Annual Twitter Bacon Blog Hop with Lydia and friends. Back away little Buddy! THAT CUPCAKE IS LYDIA'S! IT'S NOT EVEN FROSTED YET.
Oh dear, he's got a crazed bacon look in his eyes. His tail is twitching. What will he choose? BLUE ACORN or Bacon? (i know I KNOW...it's a hard choice!)
There he goes.....
Well there you have it. You can't resist anything with Bacon. Not even if you're a BLUE SQUIRREL!
Sorry Lydia, looks like this little guy had your cake and ate it too! But I hope your birthday was fan-freakin-tastic!
People love it. People love to eat it. People love to smell it frying.
People love to talk about it and blog about it (say what?)
Welcome! You've arrived to the final destination of the 1st Annual Twitter Bacon Blog Hop. We have 8 stops for your to browse and drool through(don't worry if you've arrived here first, I will bring you to the starting point of the Blog Hop at the end of my bacon rave).
First thing's first. As this IS a papercrafting blog and I'm committed to all things papercrafty, I just have to brag on this card I discovered while writing my blogpost. Bacon and papercrafts come together as one...sigh. CAN YOU BELIEVE THIS? It's a bacon and egg breakfast card! HOW happy would your eyeballs be to receive this?
Big huge thanks to Kathy (CAKath on Splitcoast) for allowing me to share her personal creation with you! You can see it here.
Bacon Blog Hop - How did this strange thing come to be?
So yesterday I'm knee deep in computer work and have tweetdeck open which allows me to categorize my tweeps (my twitter people I follow) and Lydia says something about bacon. Now, let me back up and say that I follow Lydia for her mad papercrafting skillz so the bacon caught me off guard.... and those who know me know that I'm one who can't resist putting in my 2 cents.
So I sent Lydia a message with an unconventional use of bacon. She replied back! Her office loved the idea. Really? Whoa. What have I stumbled upon here, but a cult-like following of fellow bacon lovers! How odd! How, how so very cool! Bacon lovers unite!
Over the course of the afternoon there were jokes of bacon bake-offs (a bac-off as Lydia called it, how clever!), messages of bacon recipies, and in the time it takes to fry up a pan of the good stuff we had a gregarious group of bacon foodies united through twitter. It turns out that we all blog so the natural progression to this new found bond would be to all blog about bacon, just to be cool, different and to share the love.
Let's take it one step further and we now have the 1st Annual Bacon Blog Hop organized and ready to take you an a small guided tour. Join us on each step of this tour and we'll share with you our thoughts on bacon, our love of bacon, odes to bacon, bacon stories and last but NOT LEAST each of us will share a favourite bacon RECIPE.
Let's take a moment to share a couple of video tributes to bacon, shall we?
Now this. Oh this had me busting a gut laughing. Watch the video and then I'll share something my good friend DG told me.
So my good friend DG, bless him, he's always sends me fun things and food for thought (literally). I posted a comment on my facebook page about the 1st Annual Bacon Bloghop and he posted this memory:
I once cooked off 3 pounds of bacon in the oven over a few hours one night in the oven, and when it was all cooled down, I put it all in a container and placed it in the freezer. I snacked on it off and on for the next couple days here and there, and when i wanted to use some for a burger, opened the container and realized that in 3 or so days, I ate all 3 pounds of bacon, except 3 pieces!
First let me say, what a brilliant idea. Often I want some bacon for my burger but don't want to dirty up another pan....or I've thought of it too late! Thanks DG, you da man! Second let me say, dude...you aren't the only one (mmm bacon) who would be guilty of this bacon snacking goodness.
Let's also give props where they are due and say that DG is also the very same person who led me to a site completely dedicated to all things bacon. www.bacontoday.com The cult of bacon lovers is bigger and badder than you ever knew! Recipes, jokes, a bacon babe of the day (not that I support this but hey, it doesn't come between me and my bacon, so whatevs!)
So I took the time to ask a few people how they like their bacon:
My hubby: a little bit crisp, in an egg sandwich (fried egg sandwich/rye bread) My small girl: Wis mustard on it! (i know she's just going for the drama here)
My almost teenager: cooked. (hmm. The typical one word teenaged answer that can mean a multitude of things. 1. She'll take her bacon how and where she can get it as long as it's cooked. 2. She doesn't care to speak to me of such things. 3. She isn't speaking to me at all. 4. I'm lame. 5. There's bacon? Let's cut the small talk and start noshing!) Me: BLT (oh baby oh baby) (on fresh french loaf, with mayo, fresh crisp lettuce, thinly sliced tomato, thick cut bayCON)
Graziela mentioned a spaghetti carbonara (and that made me drool)
Baba (my neighbour) gifted us with a MEAN dish of homemade pierogies with onion and butter and hunks of chopped up bacon love. I love when people reward my hubby's manual labour with home cookin'. OMG. It was comfort food utopia.
Lori-Anne said she didn't like it, so I think you all better change her mind....I said she's not doing it right. ha!
Now how about the unconventional? Something a little bit different? Tonight I will attempt to make the Dark Chocolate Bacon Espresso Cupcake. The thing about cupcakes is they need icing to be a cupcake....i'm a little concerned about this flavour blend, but how can bacon go wrong?
Dark Chocolate Bacon Espresso Cupcake Recipe
12 slices of your favourite bacon (the stronger flavour the better) 2 cups flour 1 cup unsweetened cocoa powder 2 cups white sugar 2 teaspoons baking soda 1 teaspoon baking powder 1/2 teaspoon salt (omit if your bacon is really salty) 2 eggs 1 cup cold STRONG brewed coffee 1 cup of buttermilk 1/2 cup vegetable oil 1 tbsp cocoa powder for dusting
OPTIONAL: 2/3 cup dark chocolate chips
Preheat oven to 375 F/190 celsius
Cook 12 slices bacon to crisp, drain, cool then crumble. Crumble into small bits! Save 4 slices to cut up for garnish.
In large bowl stir together flour, cocoa, sugar, baking soda, baking powder and salt. Make a well in the centre and pour in eggs, coffee, buttermilk and oil. Stir. Put in crumbled bacon. Stir. Spoon batter into prepared muffin tin or foil cups.
Bake for 25 minutes for average muffin and 30 minutes for jumbo. Or until middle springs back when lightly pressed. Cool on wire rack. Frost with favourite chocolate or (creamcheese vanilla frosting) and dust with cocoa. Insert a piece of bacon into the top for garnish. NOTE: next time I may try this recipe with maple extract and pecans.
Now, if you're ever in Edmonton, AB, rumour has it that Kerstin's Chocolate was selling chocolate covered bacon strips. I'm not kidding. I would never kid about bacon.
I'm officially the last stop and as I promised, I'd link you back to the first stop on the 1st Annual Twitter Bacon Blog Hop where you will be visiting a fellow stamper and bacon lover, Leslie. You will find her bacon bloggy goodness at The Crooked Stamper.
Rewind to last Saturday..... my good friend DG had arranged and booked a Stampin' Up! workshop and a few of his close and wonderful friends were coming, which was exciting and fantastic....
So how do you balance a workshop for one dude, a few lovely ladies, all mixed interests and levels...and none I've previously met. Would feminine projects offend? Should we scrapbook? Make cards? BigShot? Small things, big things? Oh dear...
Stop thinking and start doing...just do what Stampin' Up! says to do...share what we love!
WELLLLLL, I loved the faux wood technique that I featured in a previous post...and what stamp set and colours would go with that 'look'? The stamp set...WANTED....check it out...
This starts off with an 8.5x11" piece of Kraft cardstock for the base scrapbook page. The supplies used are Kraft cardstock stamped with elements from Wanted in Ruby Red, Bordering Blue and Night of Navy. Then....sponged with Close to Cocoa, and Whisper White to give it 'grit' baby...I'm feelin' OLD WEST!
Here I've added a Very Vanilla strip along the bottom, and layered it on to a 12x12" piece of textured Chocolate Chip cardstock. A very special thanks goes out to my husband for playing a 'villainous' model so that I could have pictures for my western themed scrap page!
This would be an idea of what everything would look like with extra 'outtakes' and pictures or journalling and memorabilia added to the page. The embellished vanilla block at the top can be used for another photo or a nice journalling block!
I hope you enjoyed this other take on 'faux wood' technique and to see how easy it is to progress from small scrap page to large!
Here's the Wanted stamp set which you can order online (and all other inks and accessories as well*), even in your jammies right now, my store is always open (Canadian orders) here!
*husband not for sale, I'm keeping him as he is very WANTED
I (heart) this card so much. It was fast, it was easy and it was WAY FUNKY! Punchy cards are all the rage. I am constantly amazed by what my sistahs who stamp keep making with simple punched shapes!
Check out this card that we made in the Manly Men Class (I'm saving it for my hunny). He always fixes things around the house, big or small and it never ceases to amaze me how talented he is. I (heart) him too :)
All Supplies are Stampin Up! (of course)
Stamp set:retired<---- sniff...this is WHY it's important to get your wish list items before they retire! See the scoop on the current retiring lists by going to my AB FAB website HERE
Cardstock: brushed silver, Real Red, Kraft
Accessories: Large Grommet, silver brads
Inks: versamark, black Staz-On, circle punches, paper snips
Awhile back I did a fun and funky Manly Men card class. All projects had a masculine touch and were geared towards the men and boys in our lives. It can be difficult to create these types of cards (or find projects to CASE). CASE= copy and share everything. Yep...we stampers and scrappers have a secret language...
The first card I want to share is the faux wood technique. We used this technique and paired it with the Stampin' Up! retired Stamp set Ahoy Matey! , which is in my stash of adorable things that I am hoarding. My customers are lucky I'm such a hoarder...they can still play with old sets from time to time. NOW, I also envision using this technique with my 'western' sets....Wanted with the cowboy would look REALLY good.
Have a look at the photos and then tell me what set you think would go well with this technique!
Here's a close-up of the wood....it looks strikingly similar to my piano wood! Isn't it brilliant? I also particularly enjoy my distressed and inked edges and that itty bitty library clip by the parrot.
Here is the card straight on. I CASED the project from Dawn Griffith, stamping guru. Her website is here Dawn's Stamping Thoughts.
In a nutshell, you start out with a piece of Stampin' Up!s More Mustard Cardstock. Swipe a More Mustard Classic inkpad in continuous, long, straight lines across the cardstock. Repeat with Close to Cocoa Classic ink. Repeat again with Chocolate Chip Classic ink (swipe swipe swipe). THEN....swipe with Whisper White CRAFT ink. NOT too heavy now....just enough to add some highlight/contrast to the magical wood colours you've just created. Then I drew in the planks with a ruler and black Stampin' Write Journaller. Do dots of ink for the nails and nail holes, I happened to have an old silver ink pen so i used those to make my nails. Pretty neato huh?
If you do try something with this technique I'd love for you to link back to me or send me a message so I can come and see yours!
So, for those who know me personally and KNOW that I'm a girly girl and a ribbon-a-holic. NONE of my manly projects had ribbon. Now, let me point out that yes..this one has cotton twill tape, but it's TAPE my friends, Stampin' UP! says so!!! Besides it lends to the 'nautical' theme of the card.
That's my story and I'm stickin' to it! I hope you like the technique!
Sorry I've been away. I had a special request for this thing I used to do...
I used to make baby keepsake baskets. You know all of those itty bitty little baby hospital bracelets, keepsakes, footprints, first haircut snippets etc...well this is a 'home' for all of those little things (while you catch up on working to scrapbook them...or if you aren't a scrapbooker then this is a permanent and perfectly sweet little place for these special memories to stay).
It all starts where you take one plain Jane ordinary wicker basket.
Then with a few yards of cloth and flannel....(couldn't you just eat these adorable little critters up?) The covers, hinges, and ruffles are all hand made and hand sewn (by moi!)
Get some trimmin's and fixin's to match....(the other side has a Winnie the Pooh soft rattle, and we further decorated it by attaching baby washcloths and booties tied to the handles)
Add some baby lovin' mojo and ooey gooey goodness and you come up with this......(no pattern except in my head for now!) Of course I had to get some Stampin' Up! ribbons in there, my Sale-a-bration ribbons matched the fabric PERFECTLY!
WANNA SEE WHAT'S INSIDE? YOU KNOW YOU DO! Here's the view from one side, chock full of baby goodness. What momma wouldn't LOVE to receive one of these keepsake baskets ready to go with items to USE? I hope she loved it...
Toodles! I'll have more yummy things for show soon now that baby's gift is done, I hope you enjoyed this.
It's that time of year.....time to say goodbye to old friends, or in this case very dearly loved products, and make room for the new.
So it's farewell to alot of wonderful stamp sets, beautiful accessories and Decore Elements.
Please visit my website for the LATEST news, shop on my website for preferred customer pricing (Canadians), and to see the Summer Fun promotion for hostesses!
For the Last Chance Accessories list, please visit my website, contact me and request that I email you the document, as it will be updated daily....then I can keep you up to speed.
The accessories list is a FIRST COME FIRST SERVED basis and also contains some items that are discounted up to 50%. You won't want to miss it! This list includes punches, papers, inks, scrappin' kits, tools, hardware, ribbons and 'bling'. Don't forget, you get preferred customer pricing when shopping on my web-store and your order is processed instantly!
In addition to pictures of our Last Chance products, you will also find the following on my website: video tutorials, product ideas, and the new Summer Fun promotions.
It's another colour challenge by Kristina Werner! You can view her blog here.
This colour challenge was difficult. I do not work well with primary colours. I almost bailed on this challenge, and maybe after you see what I created you might wish I had! ha!
And I'm not a practicing scrapbooker.
What did I make? You got it, a 12x12" scrapbook page with colours that made me lie awake at night thinking...what to do...what to do...
Then as I sat staring into my pile of designer papers...Rockabilly jumped out with its big jumbo polka dots and i was taken back to a time of big bold colours, big patterns, big hair, big flowers, big attitude, big music....YES YES...the 1980's called and they want me back!
So here's my Big Bad scrapbook page. It's got all the colours, big texture, big flowers, acrylic paint on window sheet, ....it's got it all.... The journalling is my favourite movies and bands from the 80's. The pictures are of me having an 80's moment with my shirt, hair and eyemakeup. The feel i was going for was kind of a funky 80's teen magazine pinup/locker layout...all that was missing was some notebook paper ripped from a scribbler.
The picture with the paper clip can hang from the black strip at the top, or tuck into the polkadot pocket....so there are options baby!
Next is a closeup of the flower, black Stampin' Up! grommets baby! YUMMO. The flower was created with my Daisy die and my BigShot die cutting machine. You can see THOSE in my online store HERE.
Next up you can see the matching blue paper clippie, the pockets, the painting and more. I hope you enjoy it! PS...did I mention that as I was printing my pix, the printer splatted black ink all over everything...it's the project that almost killed the crafter! Video may have killed the radio star...but I survived....oh dear...I'm about to go on an 80's music escapade...I leave you now!
If you've been following my blog in the past few days, you'll have seen my submission for Kristina Werner's colour challenge #52. My first challenge EVAH! (I'd been stalking for a long time, but not brave enough to participate).
This morning, I wake up and do the email and blog visit routine where I drink coffee and enjoy 'coffee for my eyeballs' ...which is what I call all of the wonderful visual creations posted by the paper ARTISTS I follow. There's a few comments to my blog, which makes my heart smile. Then I have an out of body, surreal, mind-blasting experience when I realize a few of the comments are telling me that I've made Kristina's top 20 picks for the challenge!
Envision coffee only half raised to lips, one eyebrow lifted, my brain racing...."top 20? There's a top 20? What does that mean"?
I DO follow Kristina's blog, so I'm slightly confused by the top 20 only because...... I know it as "The Roundup". THE ROUNDUP....
MY card made it to THE roundup....the one at the end of the challenge where the mighty Kristina whom I adore picks her favourites, puts their little images in a uber cool little collage and shows them to all of internet-dom (okay that's not a word) to feast their crafty eyes upon?
MY card...in THE roundup!
Why don't you go on over to Kristina's and feast your eyes upon the roundup, there is a herd of crafty goodness just waiting for you to point and click!
Isn't it pretty? I love the collage...(see me in the third row down, first card...yay!) Click on the image to go to Kristina's blog and see it all for yourself (bigger and better!)
I have a few sweet blogs that I visit all of the time with my morning coffee. They are like coffee for my eyeballs in the morning. They get my eyes and creative soul up and jumpin', ready to proceed with the day.
One particular blog I visit routinely is Kristina Werner's blog. A few days ago, my eyes feasted upon her new colour challenge. She has a new one every week. The challenge has a groovy picture for inspiration, and with it a colour swatch of 'mandatory' colours that are to be used in your creation.
I loved the colours.
The colours drove me to do something I've never done in my 3+ years as a papercrafter.....I MADE SOMETHING FOR THE CHALLENGE! And if I may toot my own horn, it's kinda pretty!
So here is the inspiration picture for Challenge #52
Here's my creation, do you LIKE it? :)
This mini-card folio uses the Thoughts and Prayers stamp set (tree), Oval All Stamp set, the coordinating Scalloped Oval punch, a white Button Latte' flower button, Taffeta "Kraft coloured" ribbon, whisper white/so saffron/baja breeze/more mustard/kraft cardstock and inks. (All Stampin' Up! products were used).
Here's a few close-ups of the project:
First, the inside of the folio, holds a few little 'note cards' and envelopes. I plan to use mine as hostess gifts for ladies who book parties. They deserve a little something special! The note cards they can decorate and embellish with sentiments of their choice! Cool hey?
Next up is a close up of the embellishment. I just love these little buttons, they are so sweet and add a classy touch, I think it compliments the scallop oval very nicely! If you want to browse our fabulous products and accessories you can visit my online store here.
Last but not least....a zoom in on the paper piercing! I love my Crafter's Tool Kit. Faux stitching and paper piercing are a wonderful techniques that add a little texture to a project without going over the top. Check it out:
Here's a snapshot of the main stamp set that I used. I have a feeling I'll be using it a lot more :)You can click on the photos to see them in a larger format.
If you are in the Edmonton area and would like to host a Stampin' Up! party, contact me through my website here and I'll be bringing this cute little gifty to YOU! Click here to view the fun and benefits of having a home party where I bring the fun and crafting to your home.


 Happy Stamping! I hope you make a mini-herd of Bookmark Cards!


